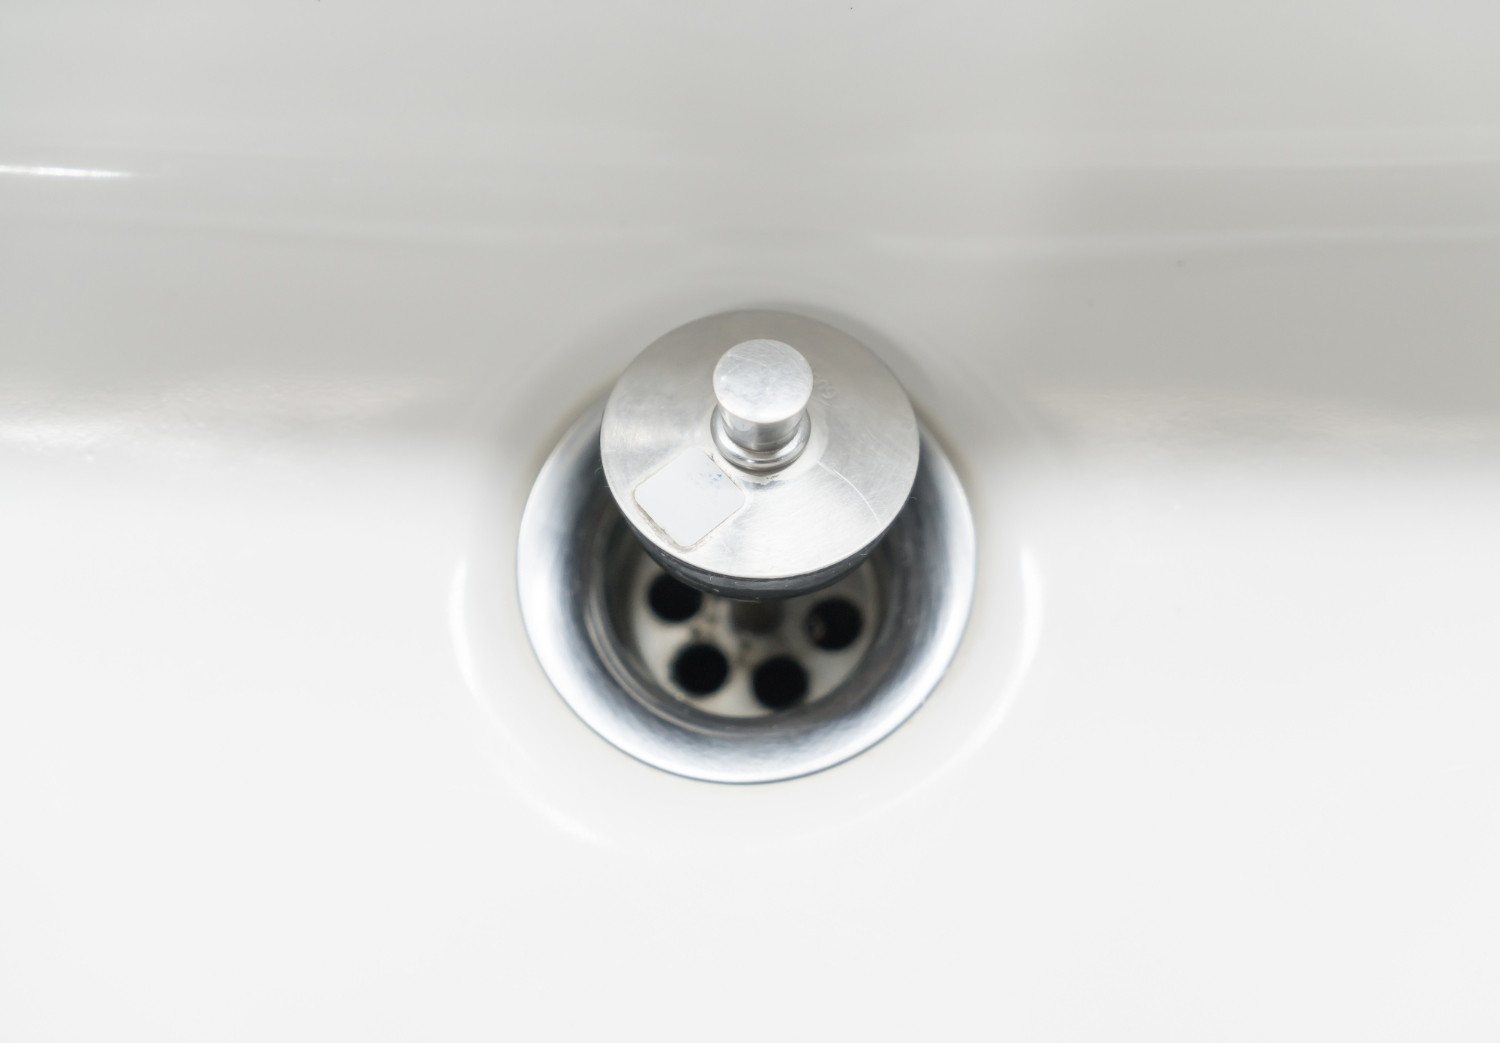
Is your bathroom sink drain clogged, or do you simply need to clean out the drain? Removing the bathroom sink stopper is a relatively simple DIY task that can help you achieve a free-flowing drain and maintain a clean and hygienic sink. Bathroom sink stoppers, including pop-up stoppers and those connected to a plunger rod, […]
03 Mar 2024

19 Feb 2024

26 Aug 2022
20 Mar 2023
10 May 2022

24 May 2022

29 Mar 2023
Is your bathroom sink drain clogged, or do you simply need to clean out the drain? Removing the bathroom sink stopper is a relatively simple DIY task that can help you achieve a free-flowing drain and maintain a clean and hygienic sink. Bathroom sink stoppers, including pop-up stoppers and those connected to a plunger rod, are essential for maintaining proper drainage. Understanding how to access and clean these components can prevent issues such as slow drainage or leaks. In this step-by-step guide, we’ll walk you through the process of removing a bathroom sink stopper, whether it’s a pop-up stopper or a different type.
Before you begin, gather the following tools and materials:
There are several types of sink stoppers available, each with its unique features and removal methods. Knowing the type of sink stopper you have can make the removal process much easier. Here are the most common types of sink stoppers:
Start by clearing the area around the sink to give yourself ample workspace. Place a bucket or container beneath the sink to catch any water that may spill during the process. This will help prevent a mess and save you time cleaning up afterward.
Put on a pair of rubber gloves to protect your hands from any debris or dirty water that might come out when you remove the stopper.
When removing a sink stopper, it’s essential to take some safety precautions to avoid any accidents or injuries. Here are some safety measures to keep in mind:
Underneath the sink, locate the pivot rod that connects to the stopper assembly. It’s usually connected to a horizontal rod that runs through the drain pipe.
Using adjustable pliers, carefully loosen the nut that secures the pivot rod to the tailpiece of the drainpipe. Turn the nut counterclockwise to loosen it. Be gentle to avoid damaging any parts.
Once the nut is loose, you can pull out the pivot rod. Keep an eye on how the parts are connected so you can easily reassemble them later. Place the pivot rod aside.
With the pivot rod removed, you should be able to see the stopper lever connected to the bottom of the sink stopper. This lever is usually held in place by a small spring clip or a retaining nut. Remove the clip or nut using your adjustable pliers.
With the stopper lever disconnected, you can now pull the entire drain stopper out from the top of the sink. Depending on the type of drain stopper you have, it may come out easily or require a little wiggling.
Take a moment to clean the sink stopper and drain plug thoroughly. You can use an old toothbrush and a cleaning solution to remove any accumulated grime and soap scum. Rinse it with warm water and set it aside.
While the stopper is out, it’s an excellent opportunity to clean the drain and the area around the pop-up assembly. Use a rag or towel to wipe down the inside of the drainpipe. If there’s any visible debris or blockage, remove it carefully.
Once everything is clean and free of obstructions, it’s time to reassemble the sink stopper. Follow these steps in reverse order:
Before you declare victory, run the water in the sink to ensure the stopper operates correctly and that there are no leaks underneath. Adjust the pivot rod nut if needed to fine-tune the stopper’s performance.
Congratulations! You’ve successfully removed, cleaned, and reinstalled your bathroom sink stopper. Your sink should now drain smoothly, and you’ve taken a step toward maintaining a clean and functional bathroom
If you’re having trouble removing a sink stopper, here are some common issues and their solutions:
By following these troubleshooting tips, you can easily resolve common issues with your sink stopper and ensure that your bathroom sink is functioning properly.
By following this step-by-step guide, you can keep your bathroom sink in excellent working condition and ensure that water flows freely down the drain. Happy DIY plumbing!

As the admin of Sparkling & Beyond, I bring a wealth of knowledge and passion for excellence in the cleaning industry. With years of experience in providing top-notch cleaning solutions, I am dedicated to sharing valuable insights and tips to help maintain pristine and healthy living environments. My mission is to ensure every home and office we service sparkles with cleanliness and comfort.
![]()
